Bug Shaped Mason Bee House
A buggy themed 4-H year and Earth Day all covered in one project. Check out what the Team Clover 4-H Club did to celebrate Earth Day in 2018 and see how easy it is for you to do too.

Bunny Napkins
Got a bunch of mismatch napkins that need using up or not enough matching napkins for the guest list? This is a quick fix to make them all match and add fun to Easter Dinner too. Plastic eggs are the best as you can give each guest a treat inside their napkin as well.

DIY Bug House
Looking for a fun way to study bugs? We made DIY Bug Houses with our 4-H club as part of our bug themed year.
Follow the link to see how they were also used in Leprechaun Traps to celebrate the fun St. Patrick's day tradition.
Follow the link to see how they were also used in Leprechaun Traps to celebrate the fun St. Patrick's day tradition.

Stained Glass Bug Sun Catchers
I had to learn to do stained glass work so I could teach my 4-H club how to do stained glass work. Want to see how things went for me making bugs? Follow the link above to see my fun learning experience from the my first attempt of making 2 mismatched blog pieces to a stained glass beetle and then to the more complex grasshopper.


Bird Seed Grocery Bag
Save the planet and help feed the birds too. See how easy this grocery bag is to make for yourself.

Word Bugs
Have you every seen such a strange bug? This is a one of a kind personalized bug. Find out how you can make one using you name or favorite word here.

DIY Paper Quilling Strips
Decided to give Paper Quilling art a try and you really don't want to have have to cut each individual piece of paper. Get out your paper shredder and presto you have quilling strips.

Paper Quilling Art
It doesn't have to be all "Bugs" but you could make all kinds of fun art with Paper quilling.

Puffy Paint Friendship Bracelets
Easy, Peasy and Fun friendship bracelets for the kids to enjoy over the summer.
Musical Garden Set
Made a Muical themed set for the Oldest Daughter to use in one of her fariy gardens she sells. It was not the easiest but it sure turned out nice.

Hummingbird Feeder
Team Clover 4-H has spent the last year learning lots of ways to care for wild birds and now that summer is here we have taken on the challenge of caring for summer feathered friends. We made bird baths, bird house and at our last meeting we made Hummingbird feeders.

Bird Baths
Learning about Wild Birds had led us with lots of fun projects this year. Now that the weather is warmer we moved on to what we could do to help attract birds in the summer. One sure way is to have a bird bath. Follow the link to find out how ours turned out so great.


Mini Garden DIY's

My kids wanted to make Fariy/Gnome Gardens for our 4-H club so to save the club a bunch of money we set out to make as many things as possible. We made everything from wishing wells to tire swings and moer....See some of our DIY's here.
Bird House Gourd

This year I made my first ever bird house from a gourd. Really wish I had tried it years ago as it was very easy.....But it takes patients, which for me was probably the hardest part, waiting all winter into spring to finish a project that started with a $2.00 purchase back in October. Find out if its something you have the patients for and see how I did it here.
Earth Day Gifts

Everyone likes gifts even the Earth. The kids decided they wanted to do a little gifting for Earth Day this year so they made each 4-H member a mini green house made from recycled items and organic seeds. We're raising them right and its showing! Find out what we did for Earth Day here.
My first attempt at soap making

The first though of making soap for me is LYE!!!! EEK!!! Don't like the though of working with LYE, don't worry you can make soap easy, peasy Just follow the link to my step by step directions and make some of you own amazing, good for the body soap too: http://thebullspenblog.blogspot.com/2016/01/milk-and-honey-soap.html
If you were wondering the answer is no I did not come up with this all on my own, I did plenty of searching online and even talked to a local soap maker before finally settled with a recipe from happinessishomemade.net Now keep in mind I "tweaked" the recipe a bit for my own preferences but I like how it turned out and cant wait to finally start using it.
Leaves that last

The bouquet of leaves (second picture) was made because I was looking for something to decorate my sitting porch with. I used the same basics of gluing leaves on branches only on in a much smaller scale. I put florist foam in the planter and covered it with hay. I added some tops from the corn stalks we grew then finished it off with a small scarecrow. It was actually quite easy but one of my favorite decorations so far.
MAKING 4th OF JULY DECORATIONS.
Every year at my sisters there is a huge celebration for the 4th of July with food, carnival games, horseshoe tournament and even fireworks. It is a great time and I usually help her with what I can to get everything ready for the party. I know from previous years the decorations are starting to dwindle or get shabby looking. She called me one day and asked where I found all my DIY projects so she could try to make some new decorations with out it costing a fortune. Myself I just search the Internet till I find what I'm looking for and then try to recreate it with what I have. But I did tell her to check out Pintrest. She did and found a few that she liked so I decided to save her a few dollars and make the decorations myself as a birthday present to her since her birthday is the day before her party. Lets hope she likes them.


Fire crackers!! Made from scrap wood.
 |
| 7 firecrackers made from scrap wood, piece of old clothesline, and scrap wood |

 |
| The scrap lumber was cut into random lengths and painted with Red and Blue paint that I already had from other projects |


I arranged them in to different patterns and painted words on them
 |
| To add the wick to the top I drilled a hole and hot glued the clothesline in the hole |
 |
| 1 of the 7 different fire crackers I made for almost nothing. |
My Pennant Garland.
It was really simple and took less them a half hour. |
| Here is a small section of the finished garland. |
 |
| I started with 5 red white and blue colors and cut them into triangles. The size of the triangle is determined by how big a pennant you want. Mine were only 6inch. |
 |
| I took some blue material and cut it into strips about 2inches wide to use as the string. |
 |
| I folded the string and sewed it. I also sewed the triangles on at the same time. |

The end result is over 100 feet of pennant garland. You could also sew the triangles next to each other but I chose to separate them so I would end up with a longer garland.
MAKING POOL BUOY GARLAND
I was trying to come up with a neat idea to decorate out by my mailbox since our house isn't viewable from the road. We have a fence we threw up quick to use as a decoration at Christmas time and I wanted to do a summer theme on it. I settled on a pool/beach theme for summer and needed something to use as garland on the fence. I wanted a pool buoys and didn't have one so I decided to make one from used water bottles.
Here is how I did it:
 |
| I used the smaller water bottles but I'm sure it would work with the standard water bottles too. |
 |
| I left them whole kept the cap for painting ( with the cap they are less collapsable). The cap also makes it easier to put the whole in the bottom for the rope to go through. |
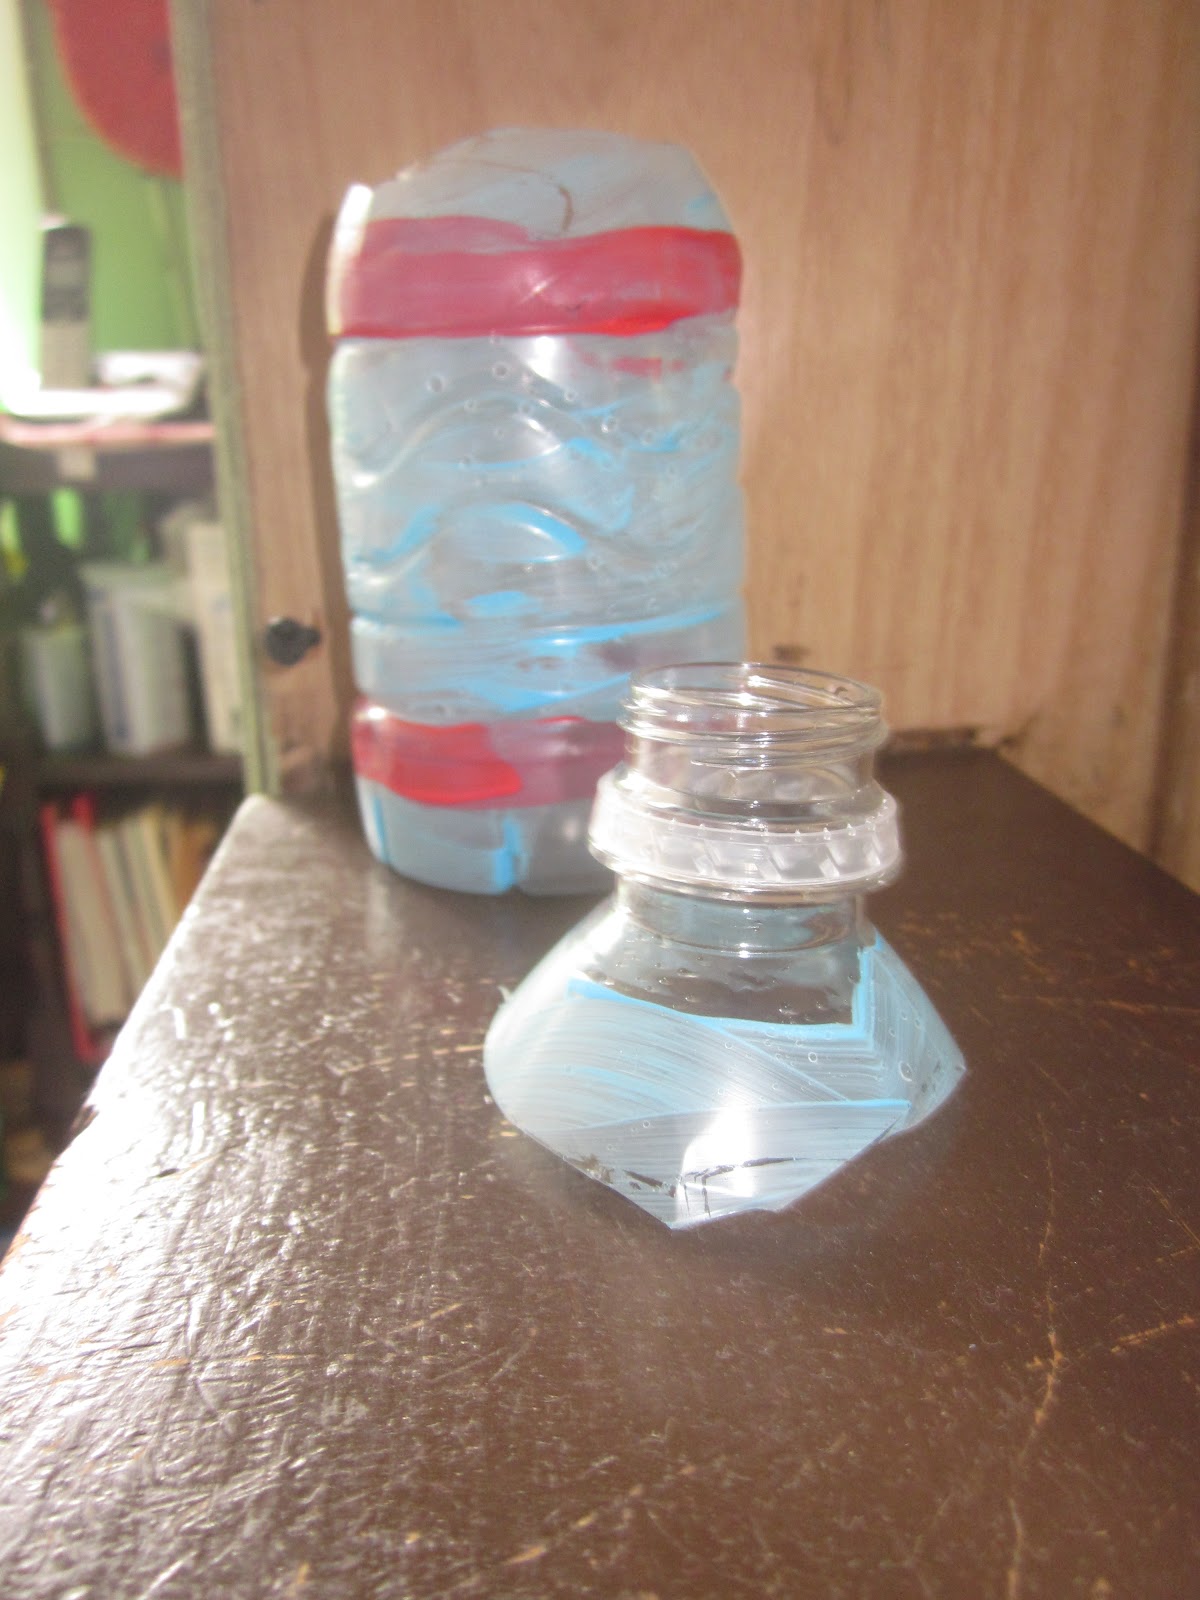 |
| There was no perfection in cutting off the top. After I cut them off I cleaned up the edges on the bottle so they weren't so jagged. To keep the rounded look I cut the bottle towards the top where it rounded. |
 |
| After threading the rope through the bottom of the bottle I tied the cut off top inside the bottle so it would hold its place on the rope. |
 | |
| The finished garland. Can't wait to put it on the fence with the other fun stuff I have planned for decorating out there. |
CLOTHESPIN HOLDERS
For the last 3 years I have used an old Easter pail for my clothespin holder...The weather finally took its toll on it and this spring it broke. Needing a new one quickly I took some of the dresses my daughters have outgrown and bibs from my son to make one. Actually I made 3 it was quick and easy and FREE!!!
 |
| Dress was pretty simple to make as I just made the neck opening bigger, sewed the bottom shut and added the hanger. The bibs were basically the same as I sewed the hanger in and sewed the legs shut. I left the side buttons open as it was easier to get the clothespins in and out. |
 |
| My 1st ever homemade clothespin holder. I simply sewed the bottom, the arms and part of the front shut. Then sewed in the hanger. I was sure it would be harder to do but it was actually that simple. |
No comments:
Post a Comment